
Post-it Pocket Case
A sturdy cover for sticky notes.


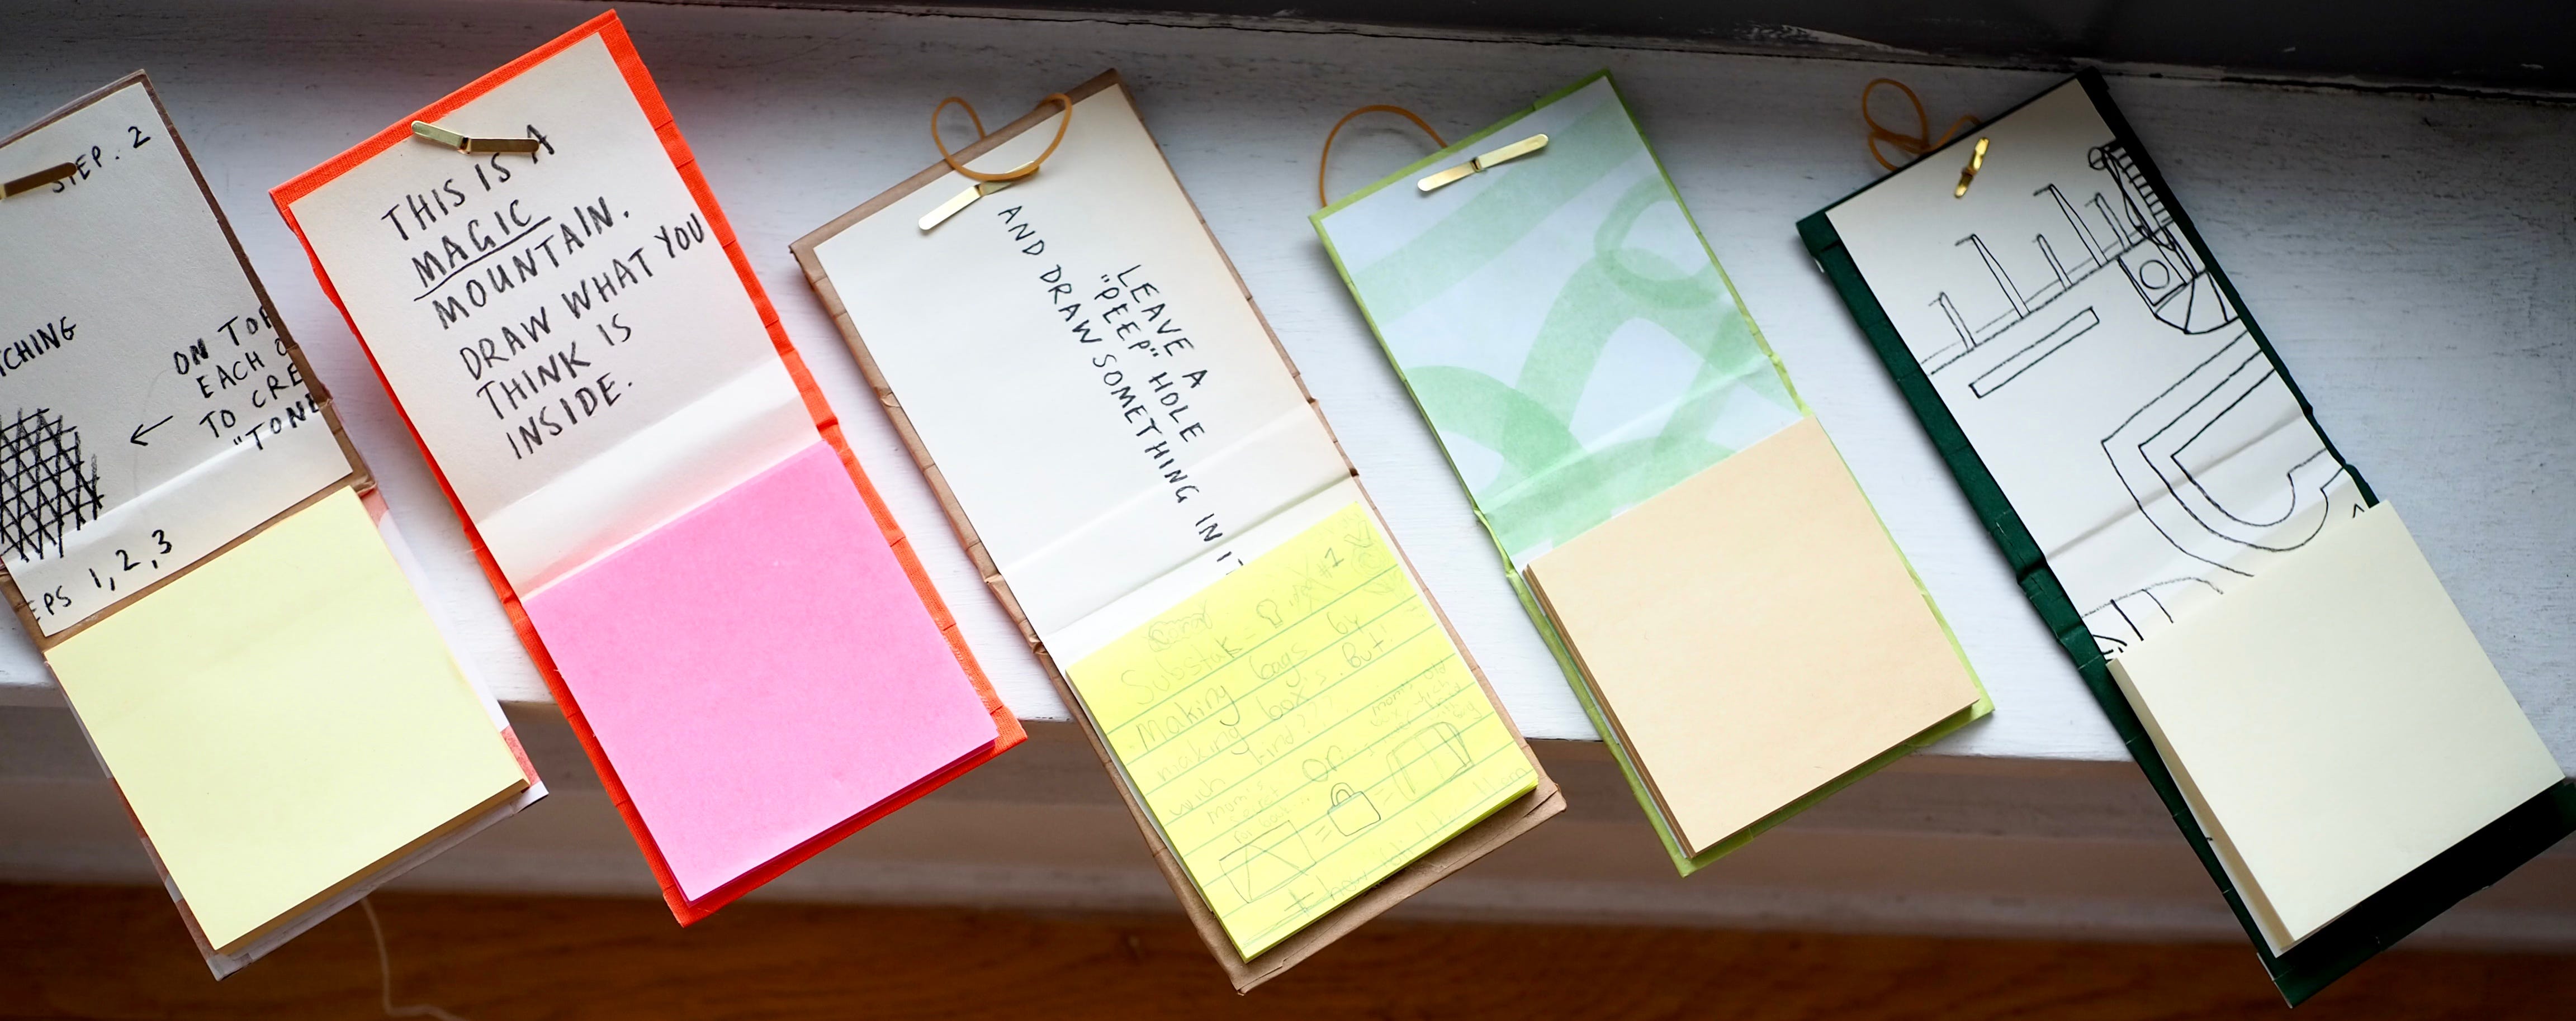
A little square of rip-off paper has always been my method for keeping track of fleeting thoughts. Post-it’s are especially appealing for their sticky back strip that can adhere to surfaces whenever reminders are needed. ‘Pick up toilet paper’- on the door to the bathroom; ‘feed the cat’- on the coffee maker, ‘please don’t eat me’-on the chocolate bar. And because Post-It’s come in a variety of bright colors, your notes can be more easily spotted. While you may not think you need a cover for your quick paper pad, a little case can help preserve the pages when thrown into a tote bag, provide structure for sketching without a table, or add a touch of refinement to your bedroom nightstand.
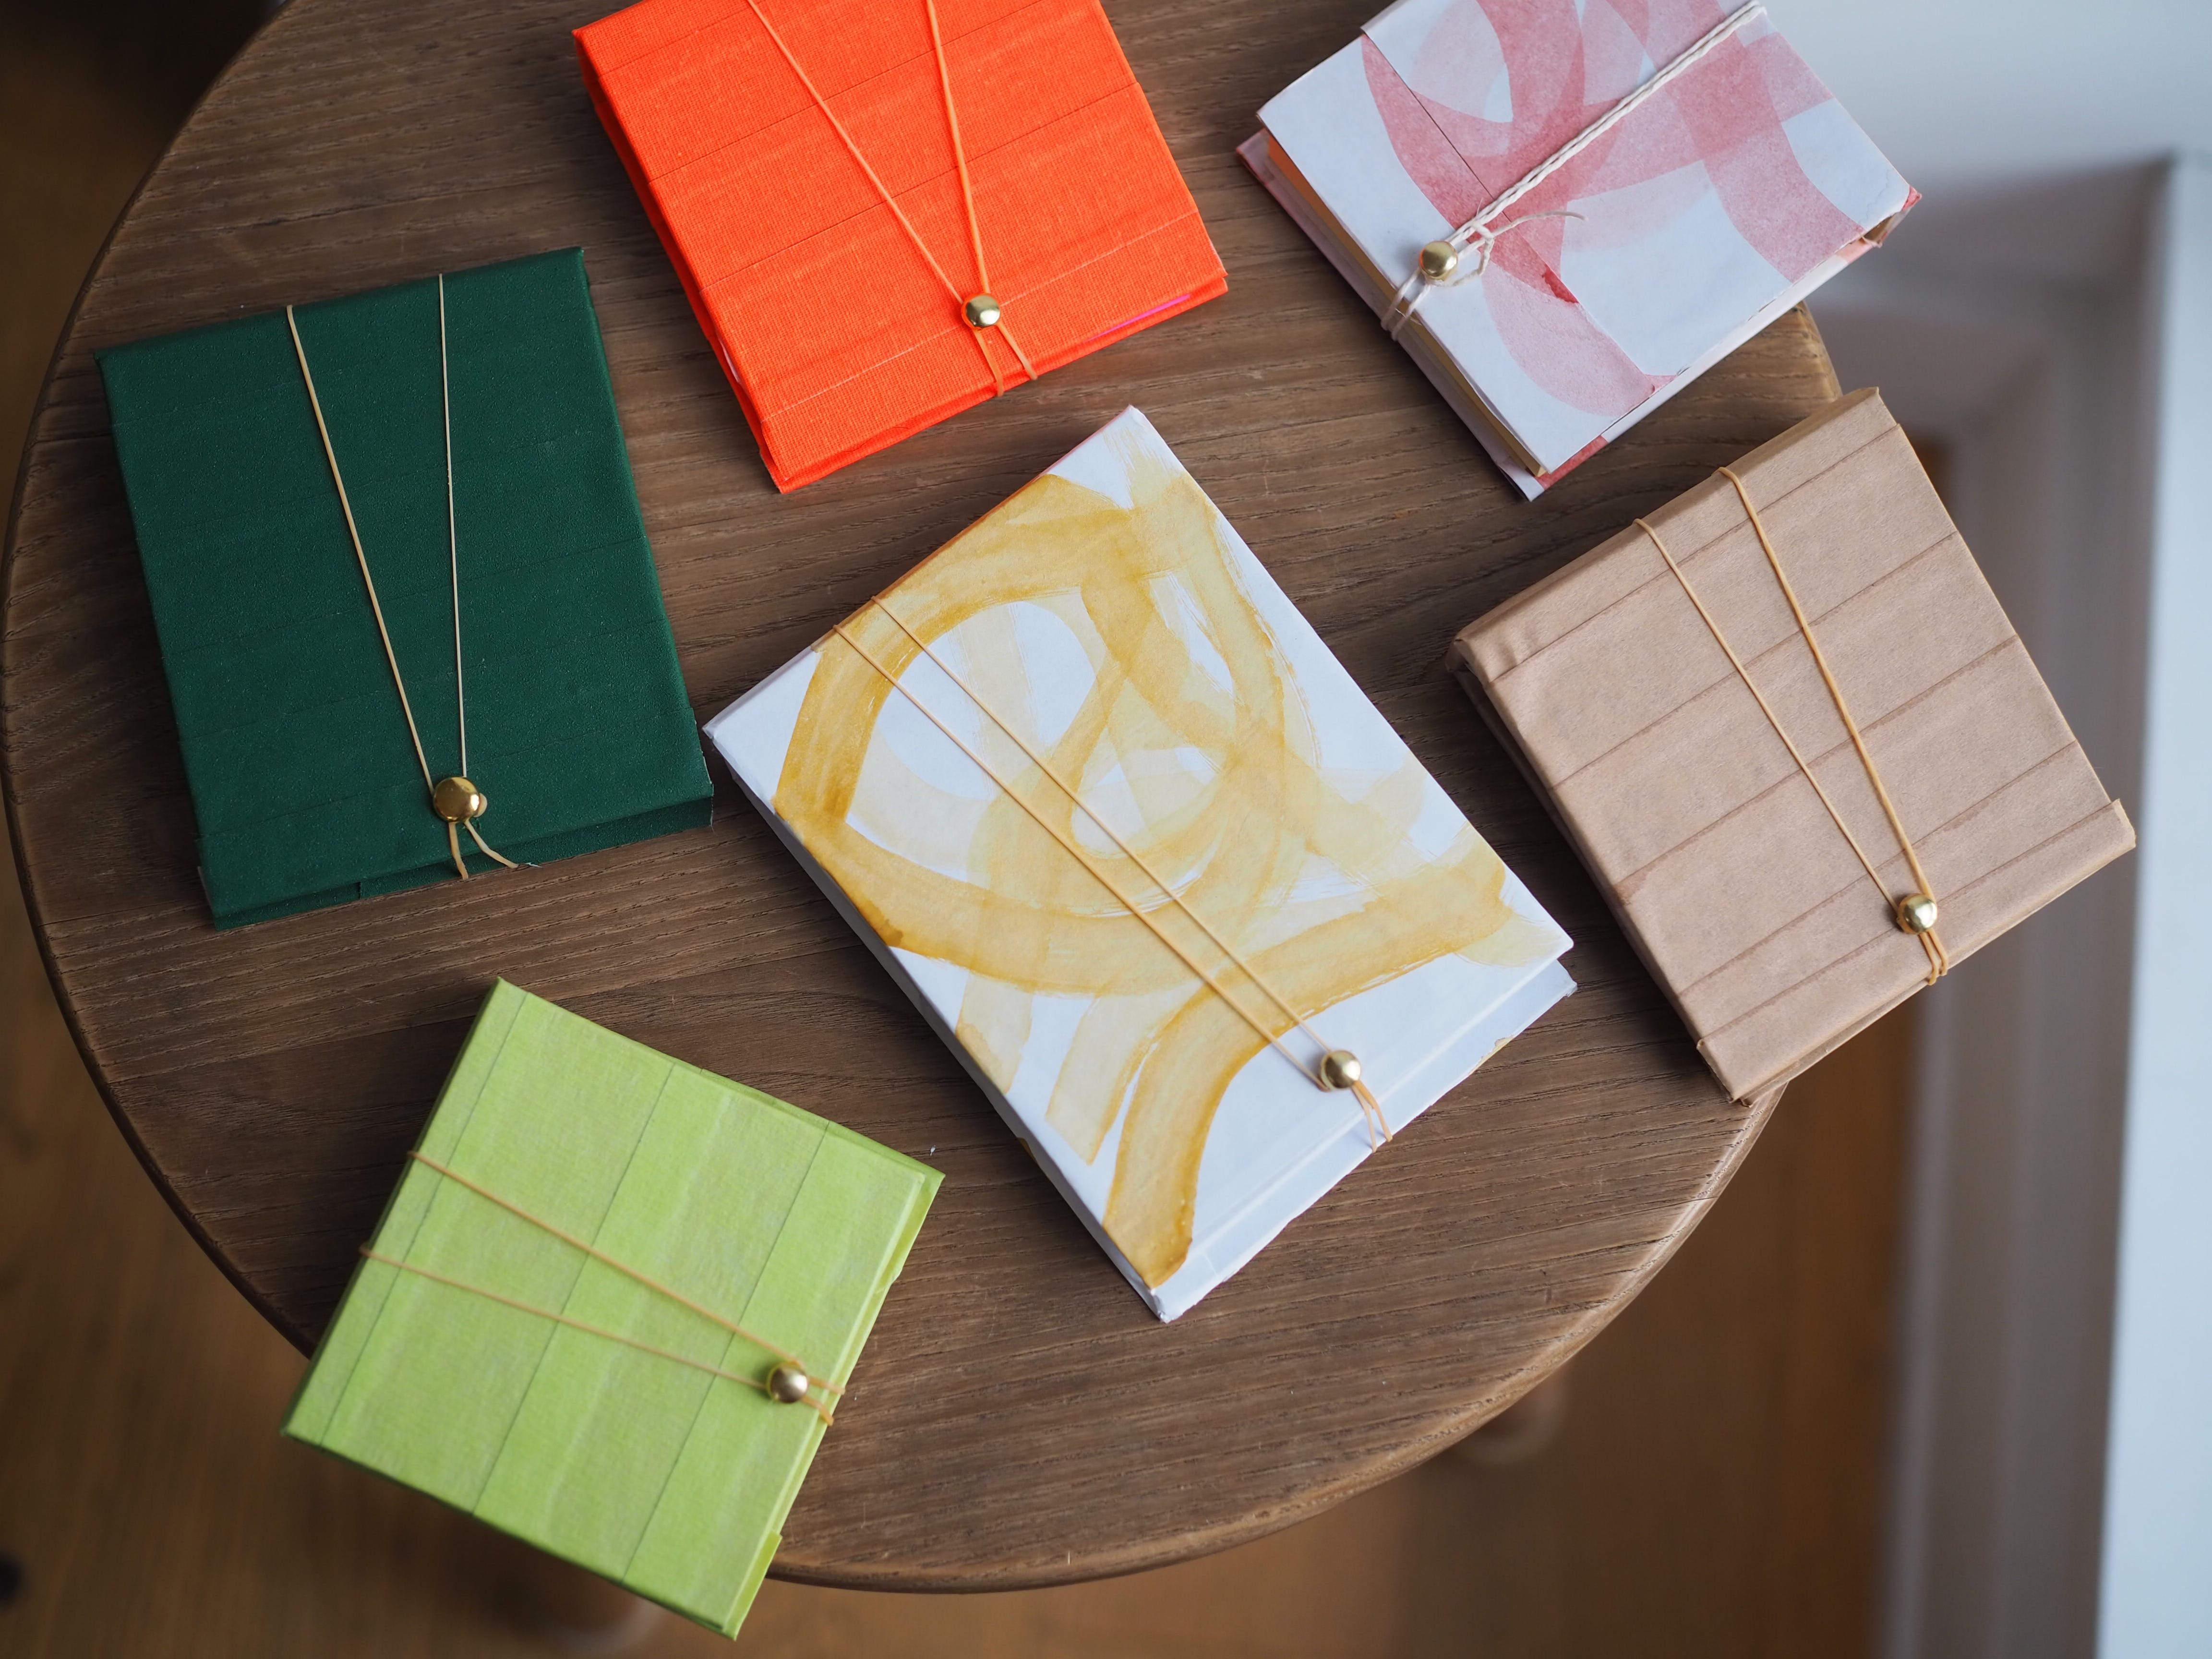
To make these small, solid, flip-open covers, I used chipboard. Chipboard is the strong and durable cardboard that can be purchased or scavanged from the back of notebooks, notepads, or hardbound book covers. While I don’t want you to prematurely strip a good book of its outer shell, no longer needed ones (such as outgrown children’s books) have beautiful inside papers and thick outer covers that can be repurposed into a wide range of craft projects. For presentation sake, I like to cover plain chipboard with strips of tape, a scrappy sticker, or glued decorative paper. I use a brass brad with a thin brown rubber band for its sparkle and simplicity, and suddenly a Post-it pad becomes a little something special.
How to make a notepad cover
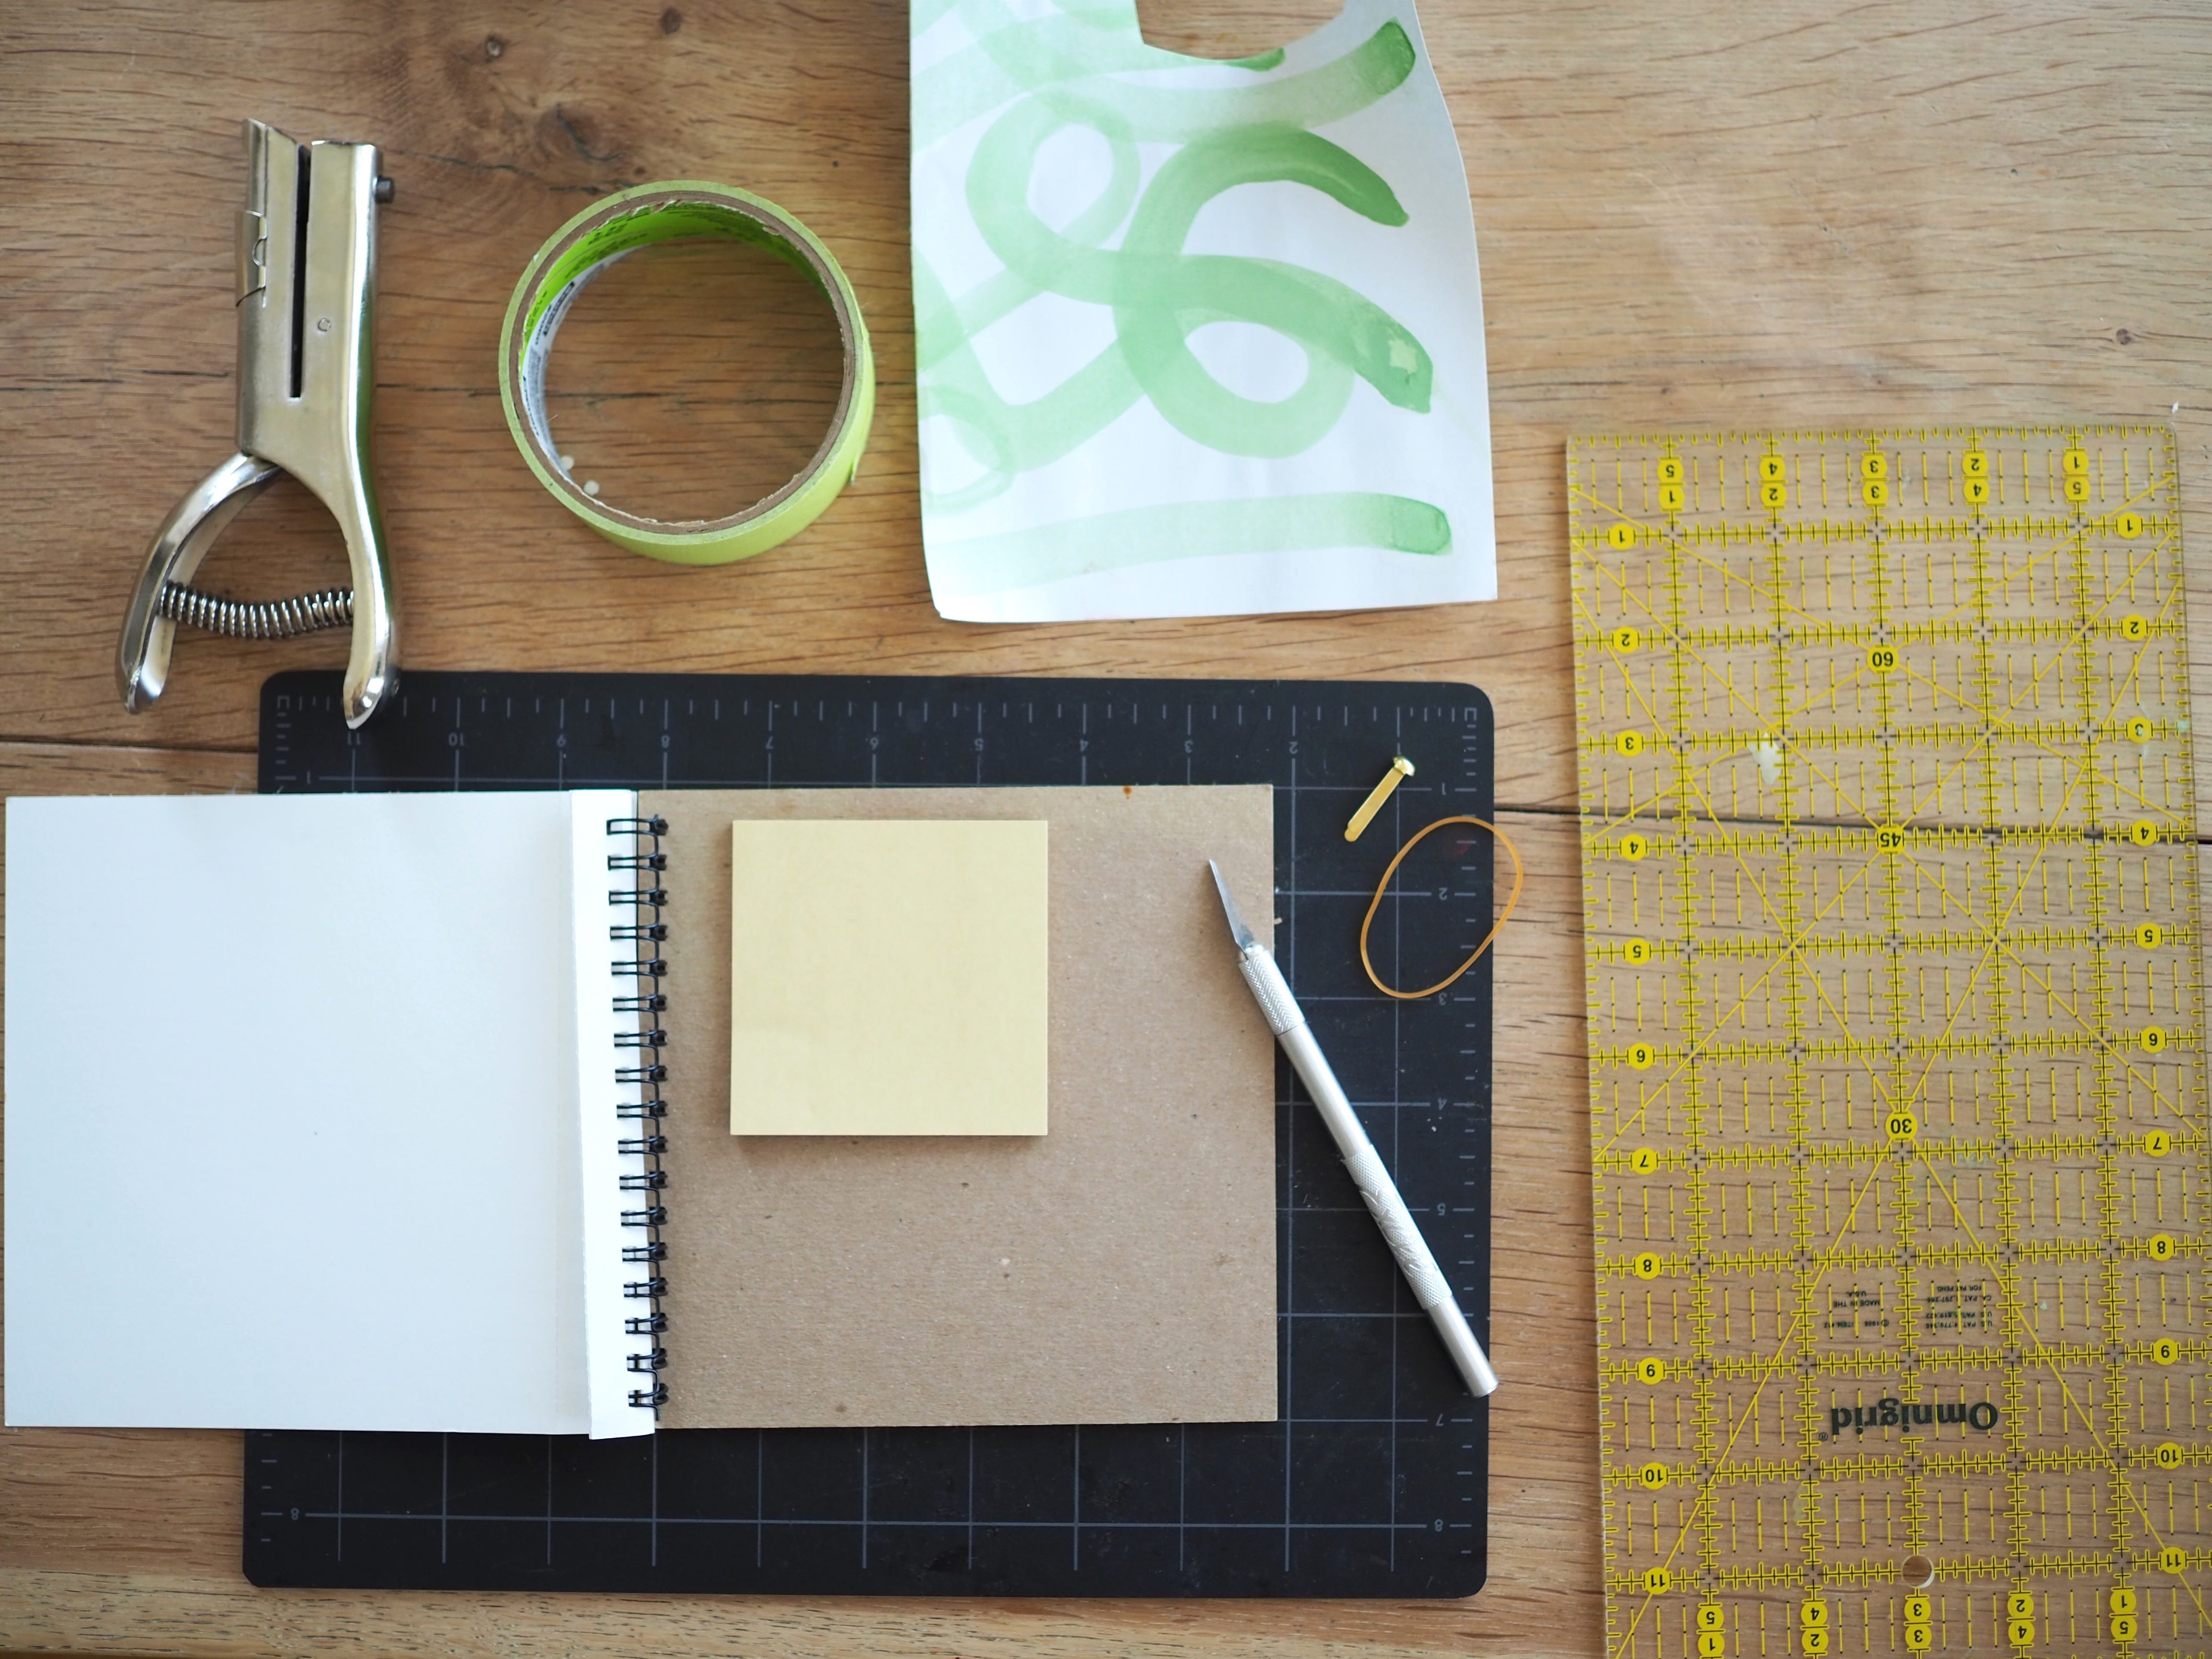
Supplies:
chip board (big enough to cover the front, back, and side edge of a Post-it pad)
gaffers tape, painters tape, scrappy stickers, or glued decorative paper (plus, extra for inside the case)
small craft knife
straight edge or ruler
hole punch (can also use your craft knife)
rubber band (or string)
brad

Cut two identical pieces of chipboard that are slightly larger in dimensions than your post-it pad.
Cut a center spine edge from the same chipboard, roughly 1/4” to 1/2” in length, and the same width as your other two chipboard pieces.
Lay out your three pieces of cardboard so the small piece is in the center, with a bit of space between all pieces. Make sure all edges line up width-wise. Cover all three connecting pieces with a strip of tape, and wrap any extra length around to the reverse side.

Continue to layer the tape in neat strips, to cover the front of the connected chipboard. The extra tape can wrap around the edges onto the opposite side, but does not have to cover the back completely.
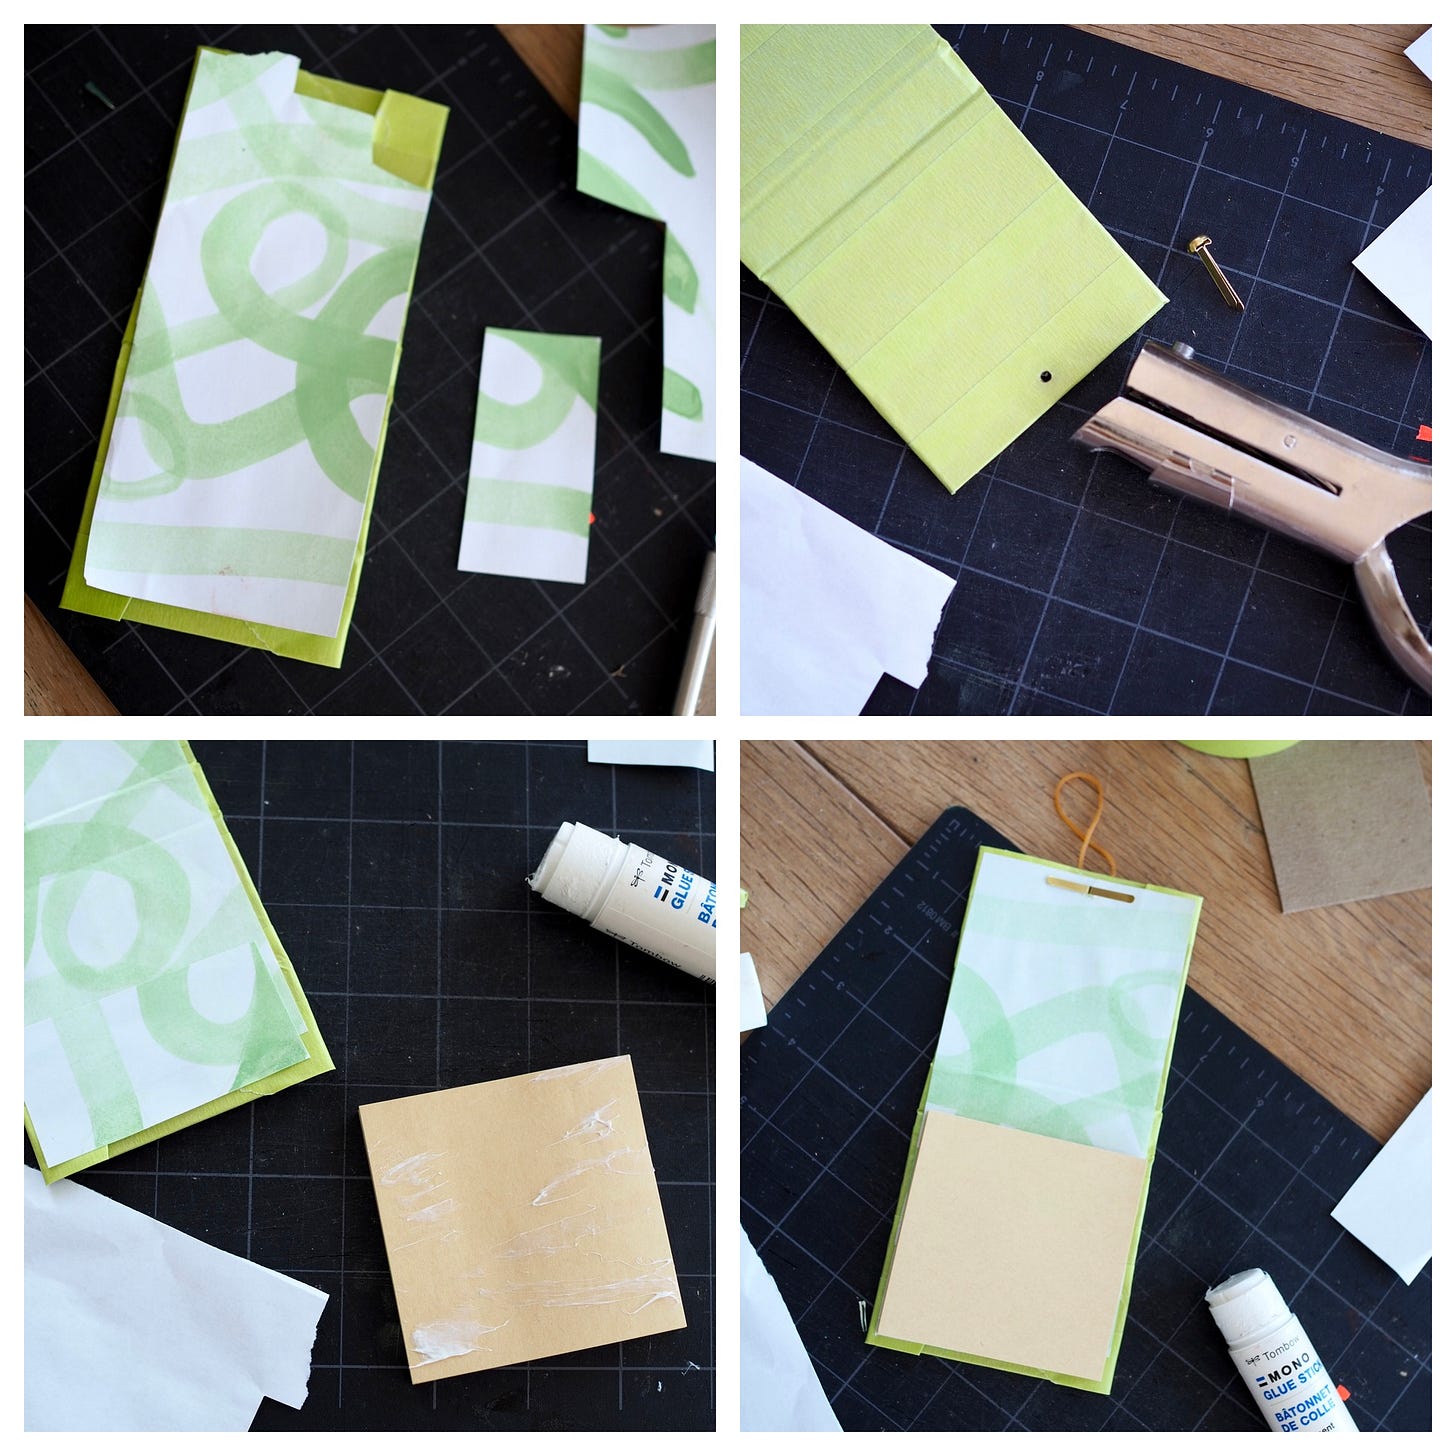
Cut a piece of scrap paper (or use a scrappy sticker) to fit along the inner dimension of the chipboard. Glue or seal in place.
Punch a hole (or use your knife to pierce) on the center, top edge of your cardboard. Insert a brad, from the front side to the back, and wrap a rubber band twice around the top.
Glue the bottom of your post-it pad to the bottom half of your cardboard cover.


Instead of a Post-it pad you can easily make a case for any small notepad by simply cutting the chipboard stock to fit the pad’s dimensions. The example below makes use of the empty space inside cover flap by using a glassine envelope to hold scrappy stickers, and a tape holder for a convenient pen/pencil along the spine’s edge.


Of course, these little cases make a great personalized gift, if you should need a last minute crafty present for Father’s Day. Pair it with your favorite pen/ pencil and make sure to write your love note on the inside cover.

And speaking of Post-It’s…. drop me a note and stick it to this post! As messages, in any form, are always appreciated!
Your posts always make me so happy! They make me look at household items, and our recycling pile, in a whole new way.
Always looking for fun ideas for adult gifts and this one is gold. ❤️