Jacket Your Journal
Two ways to keep your notebook clean, pocketed and private

I once had a math teacher who had a particular intolerance if your classroom text book was not properly covered. God-forbid a rip, tear or any exposure of a book spine, and there would be a mid-lesson, mid-sentence verbal eruption and a tossing of classroom chairs. Needless to say, everyone who took Algebra 1, Algebra 2 or Calculus at my high school in the 80’s and 90’s, knew how to transform a brown shopping bag into proper coverage; and if you didn’t, you knew better then to attend class.
Now, I’m pretty sure the kids these days don’t cover their textbooks, if they even have text books? But the scrappy act of prolonging the life of bound pages with grocery bags should be a skill to pass down, as everything fares better when jacketed. Having carried notebooks for many years, I know that exposed covers deteriorate long before the pages are filled. While I’ve considered leather bound outer layers to protect my paper bound books, I don’t want the cover to take up extra space, add weight, or cost the same amount as a pair of winter boots.
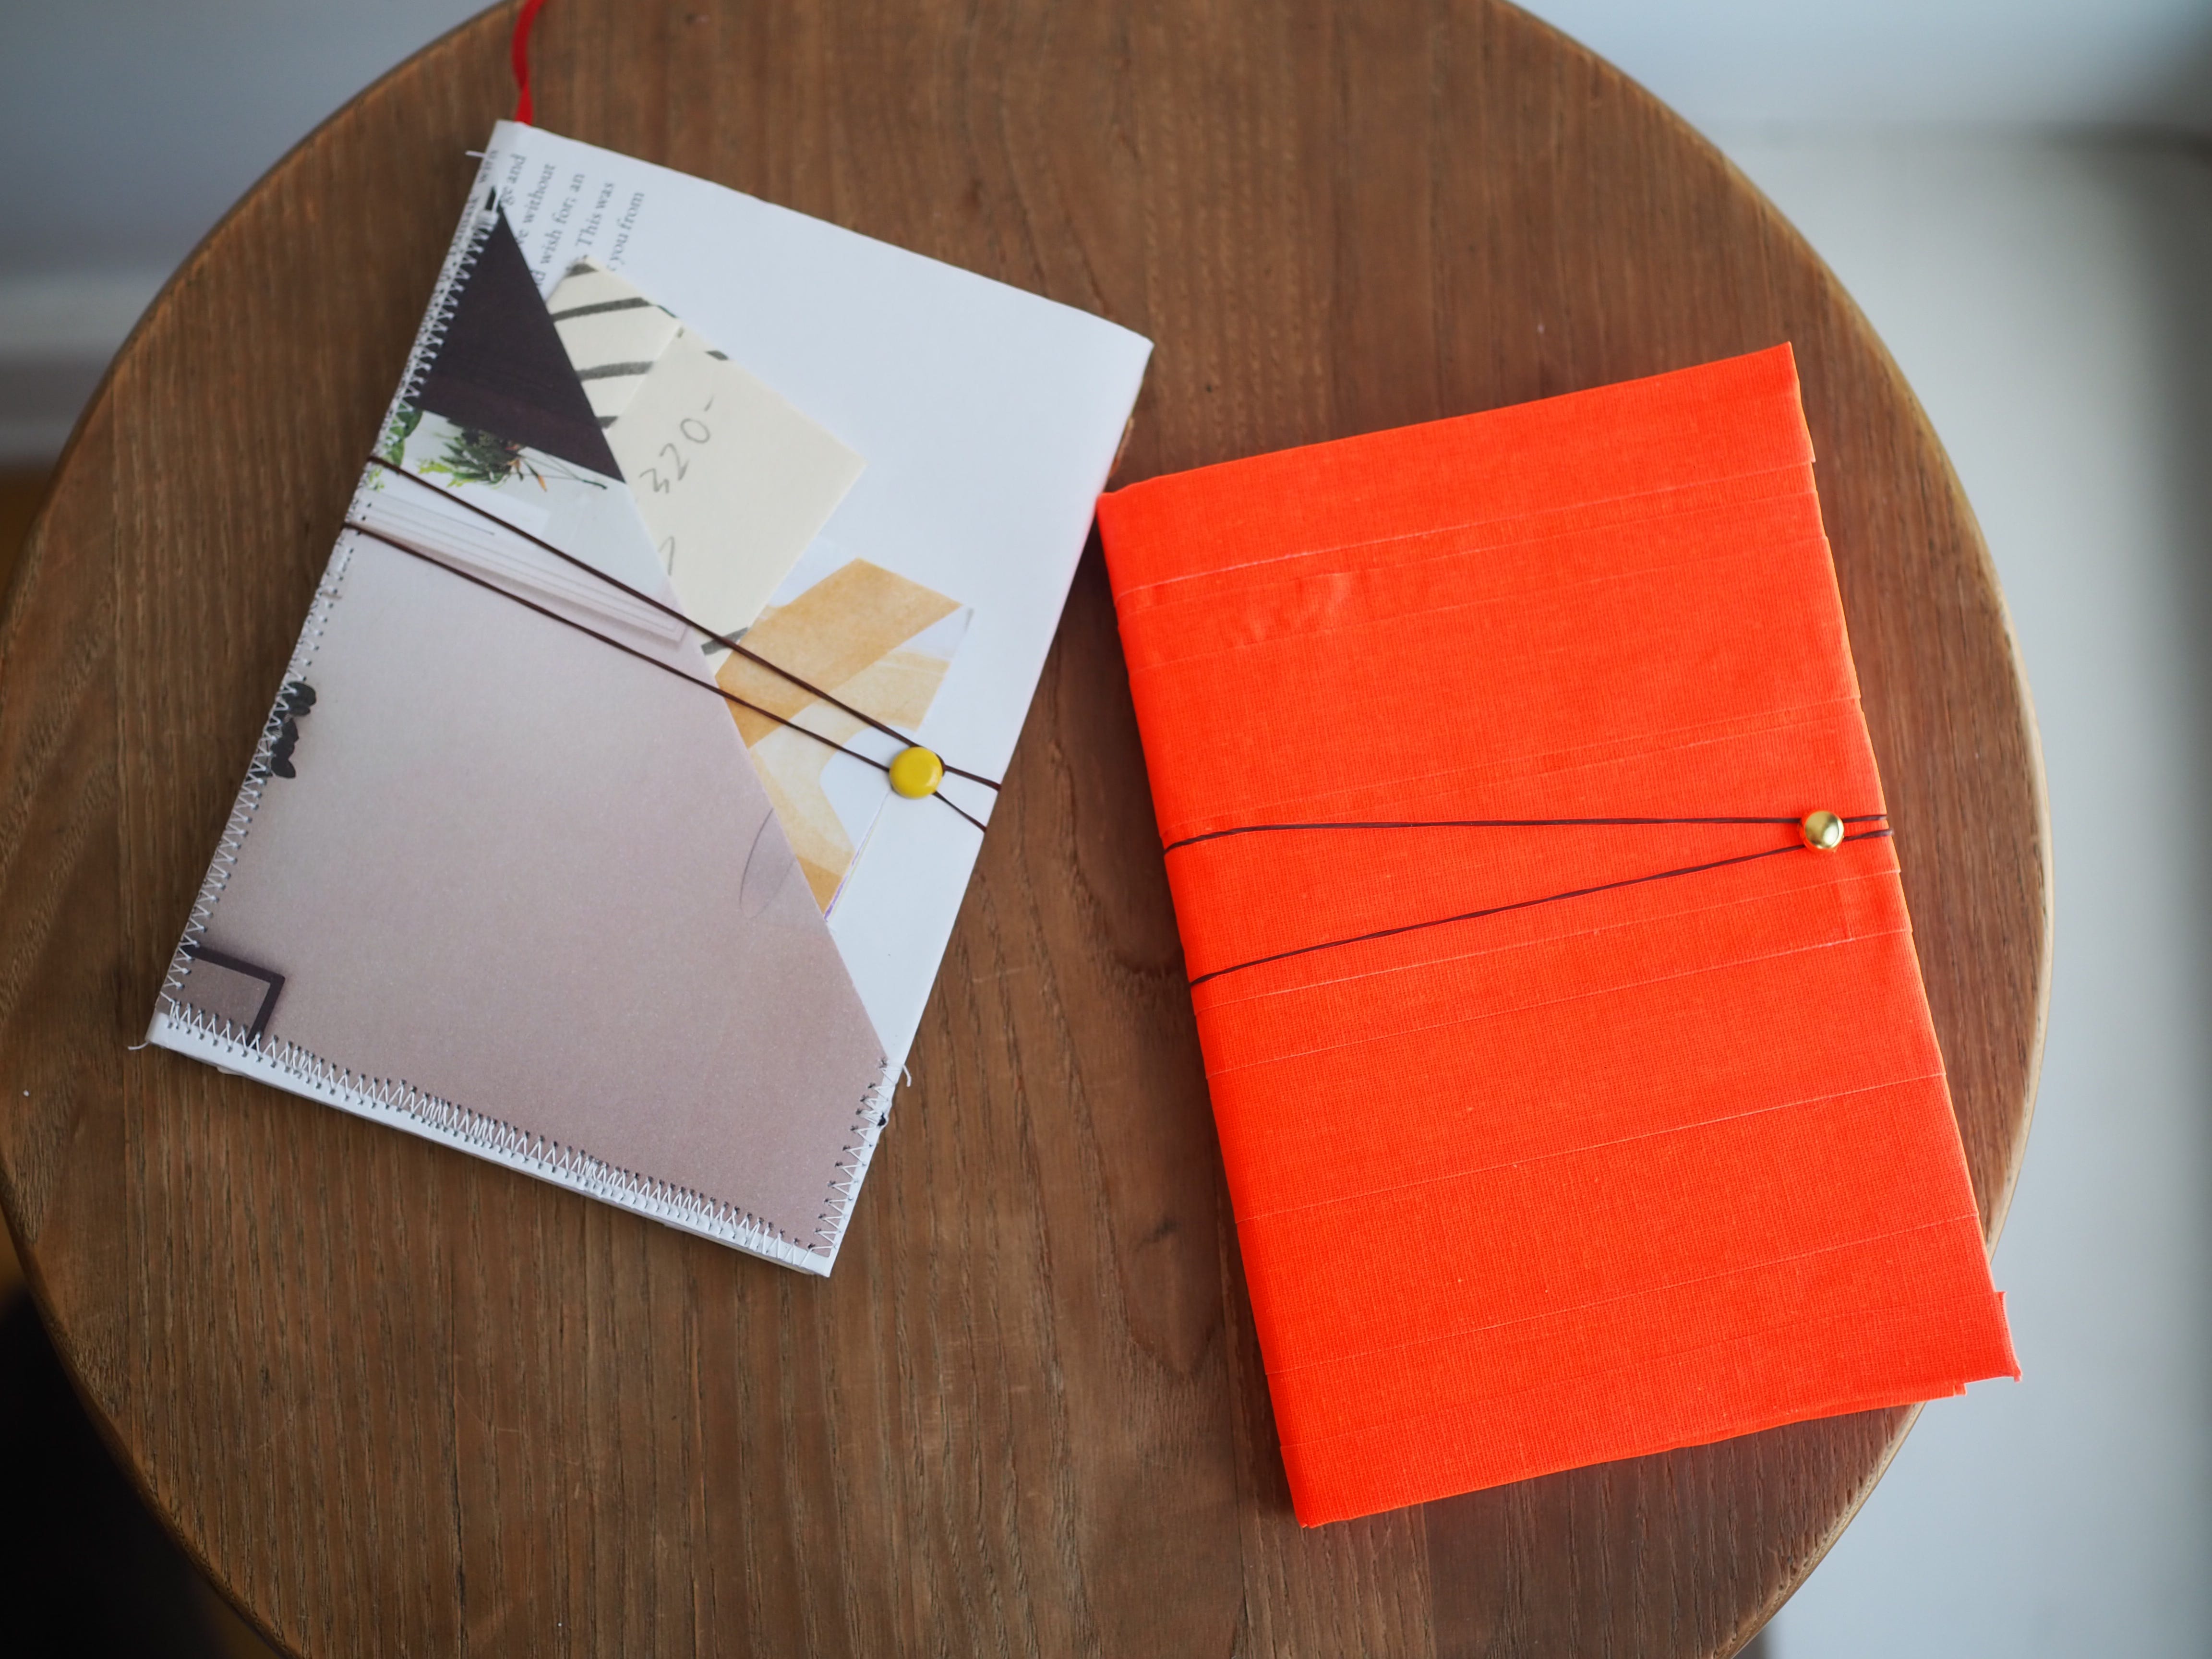
Enter the scrap-paper jacket with pockets; it’s the same foundation of the classic paper-bag cover, but with two sewn-on pockets on the front and back. Punch a hole, add a metal fastener, loop with a rubber-band, and you have a quick bind to protect the contents and secure the book shut.
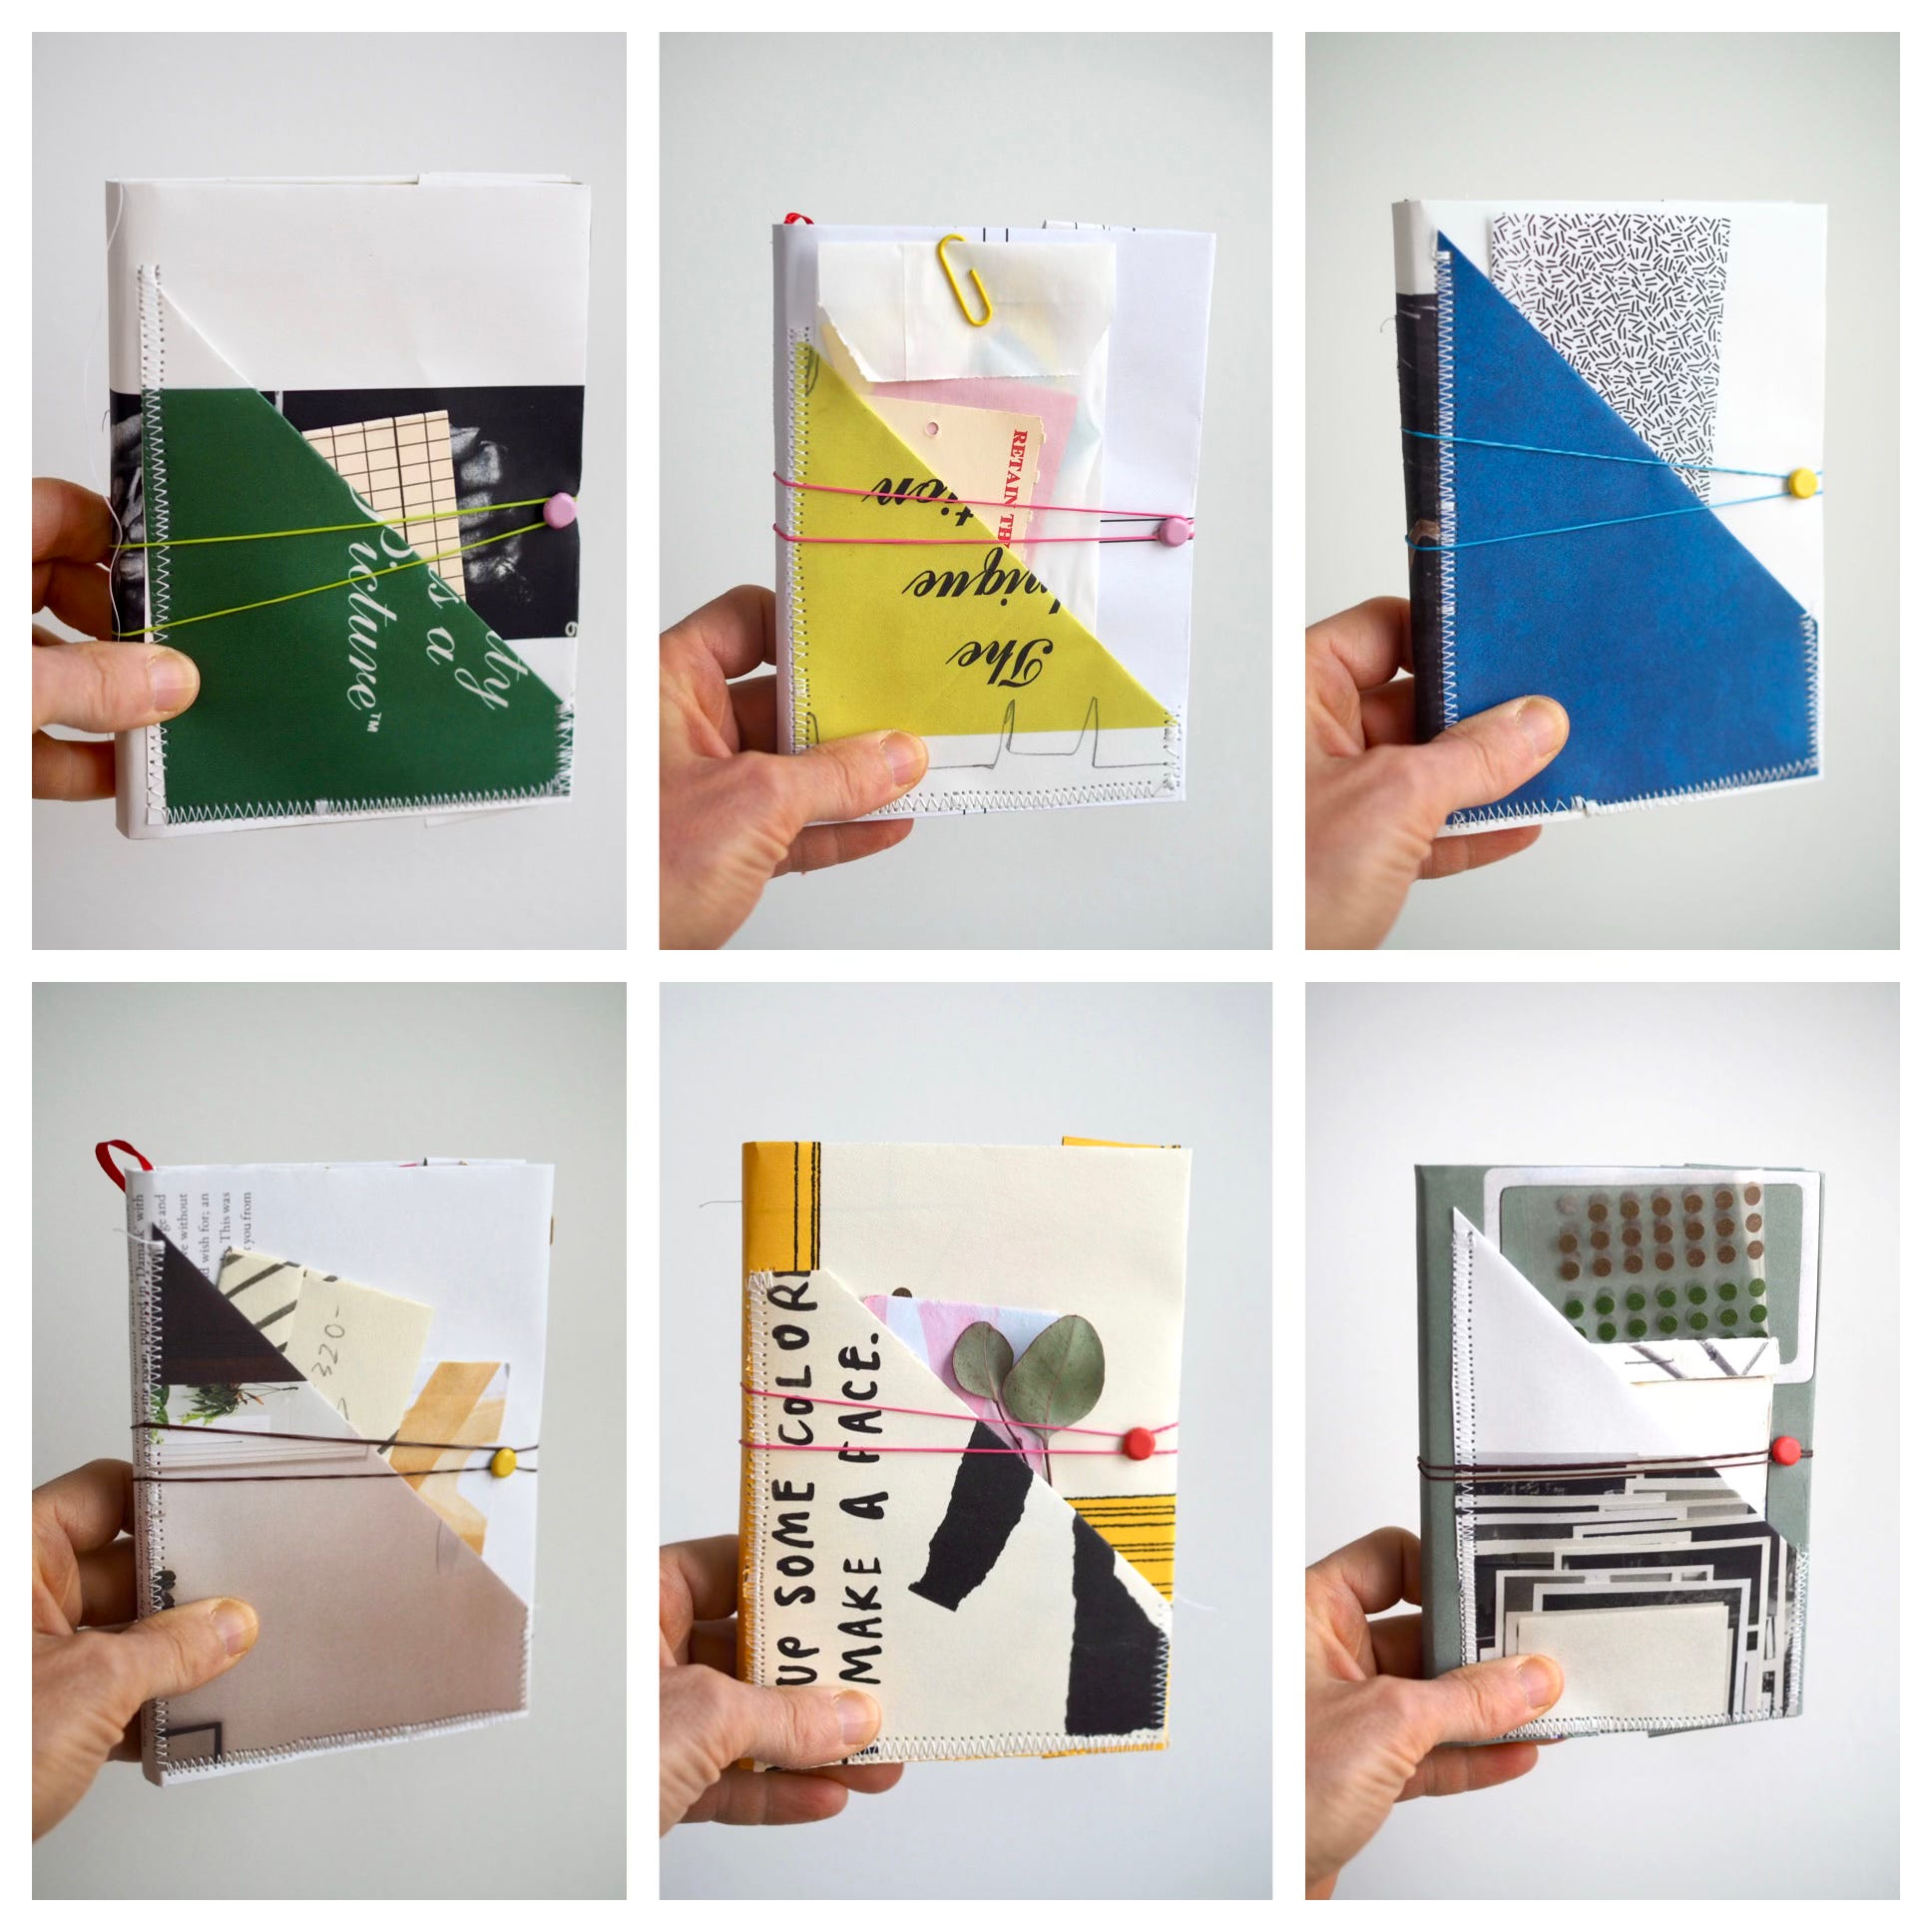
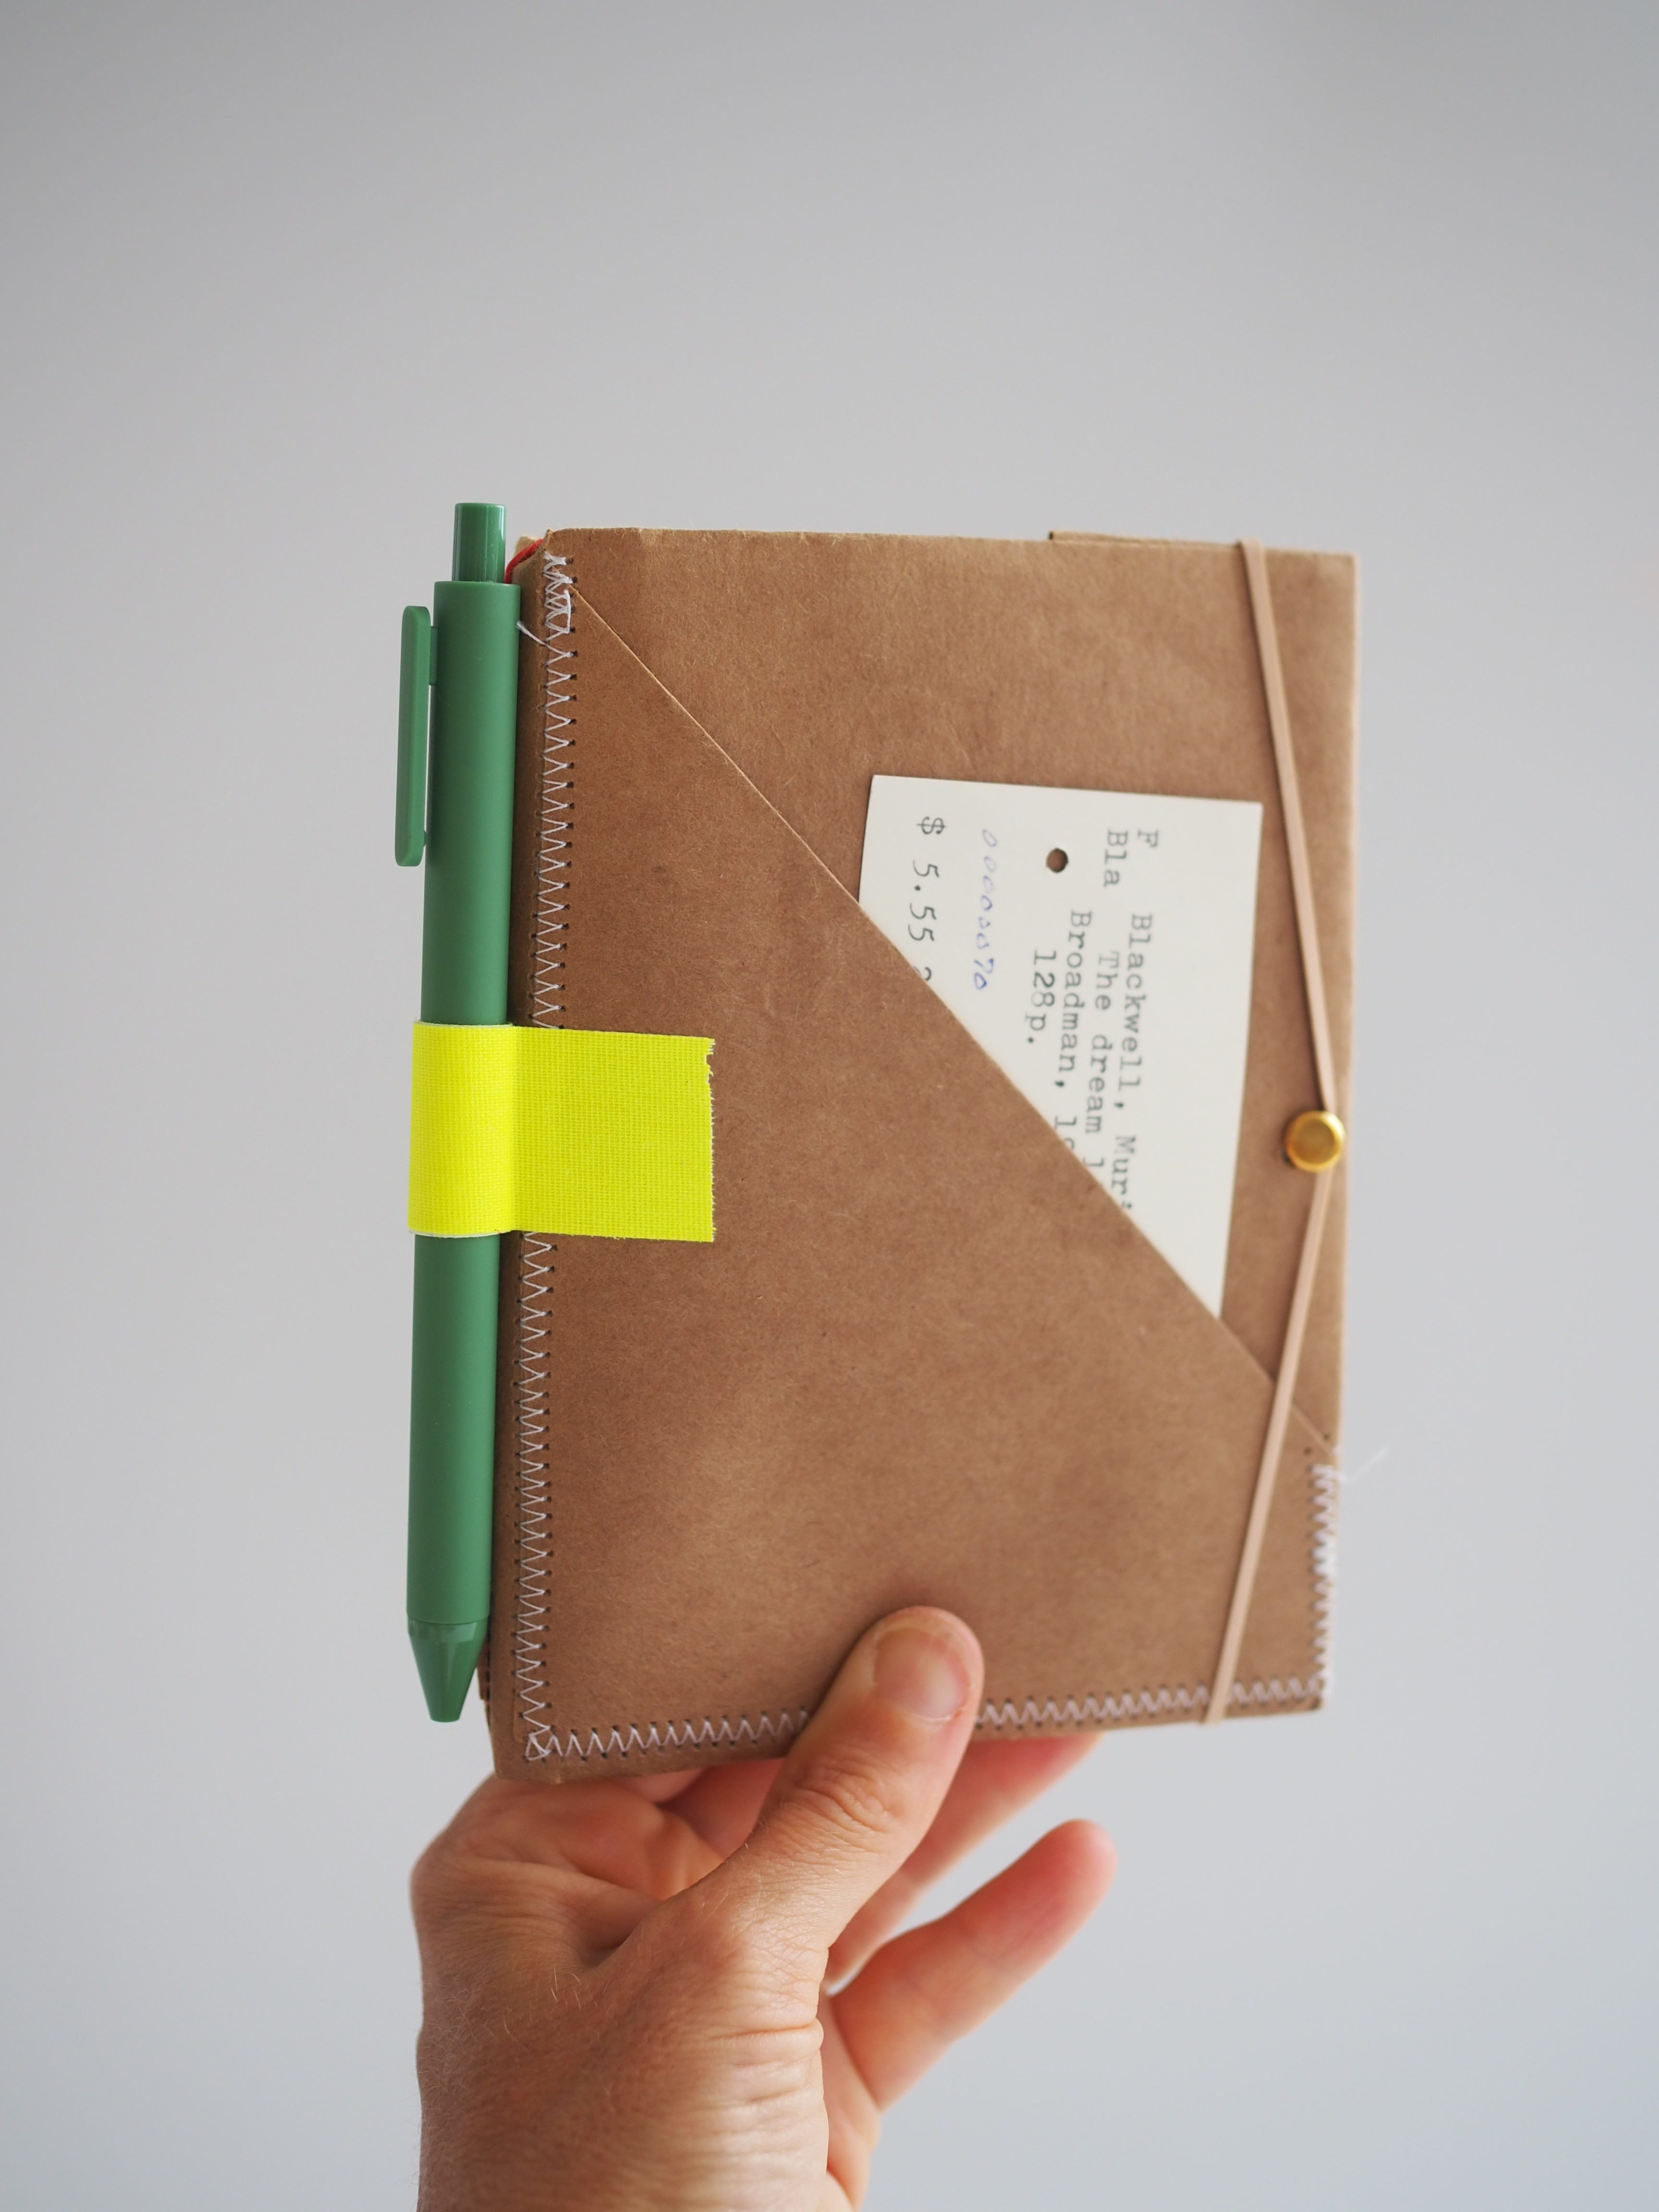
Scrap Paper Journal Cover with Stitched Pockets
Stitching on paper is visually satisfying. The defined thread dashes and tiny holes on a two-dimensional, smooth surface, will make you want to embellish sewn details on stashed scraps, and personalize your own stationary. I realize not everyone owns a sewing machine, or knows how to use one, and so the added pockets on these journal covers might be a bit out of reach. However, if you could get your hands on your neighbor’s machine, or maybe check one out at your local lending library, this is a great beginner sewing project, and will take all of two minutes to make.
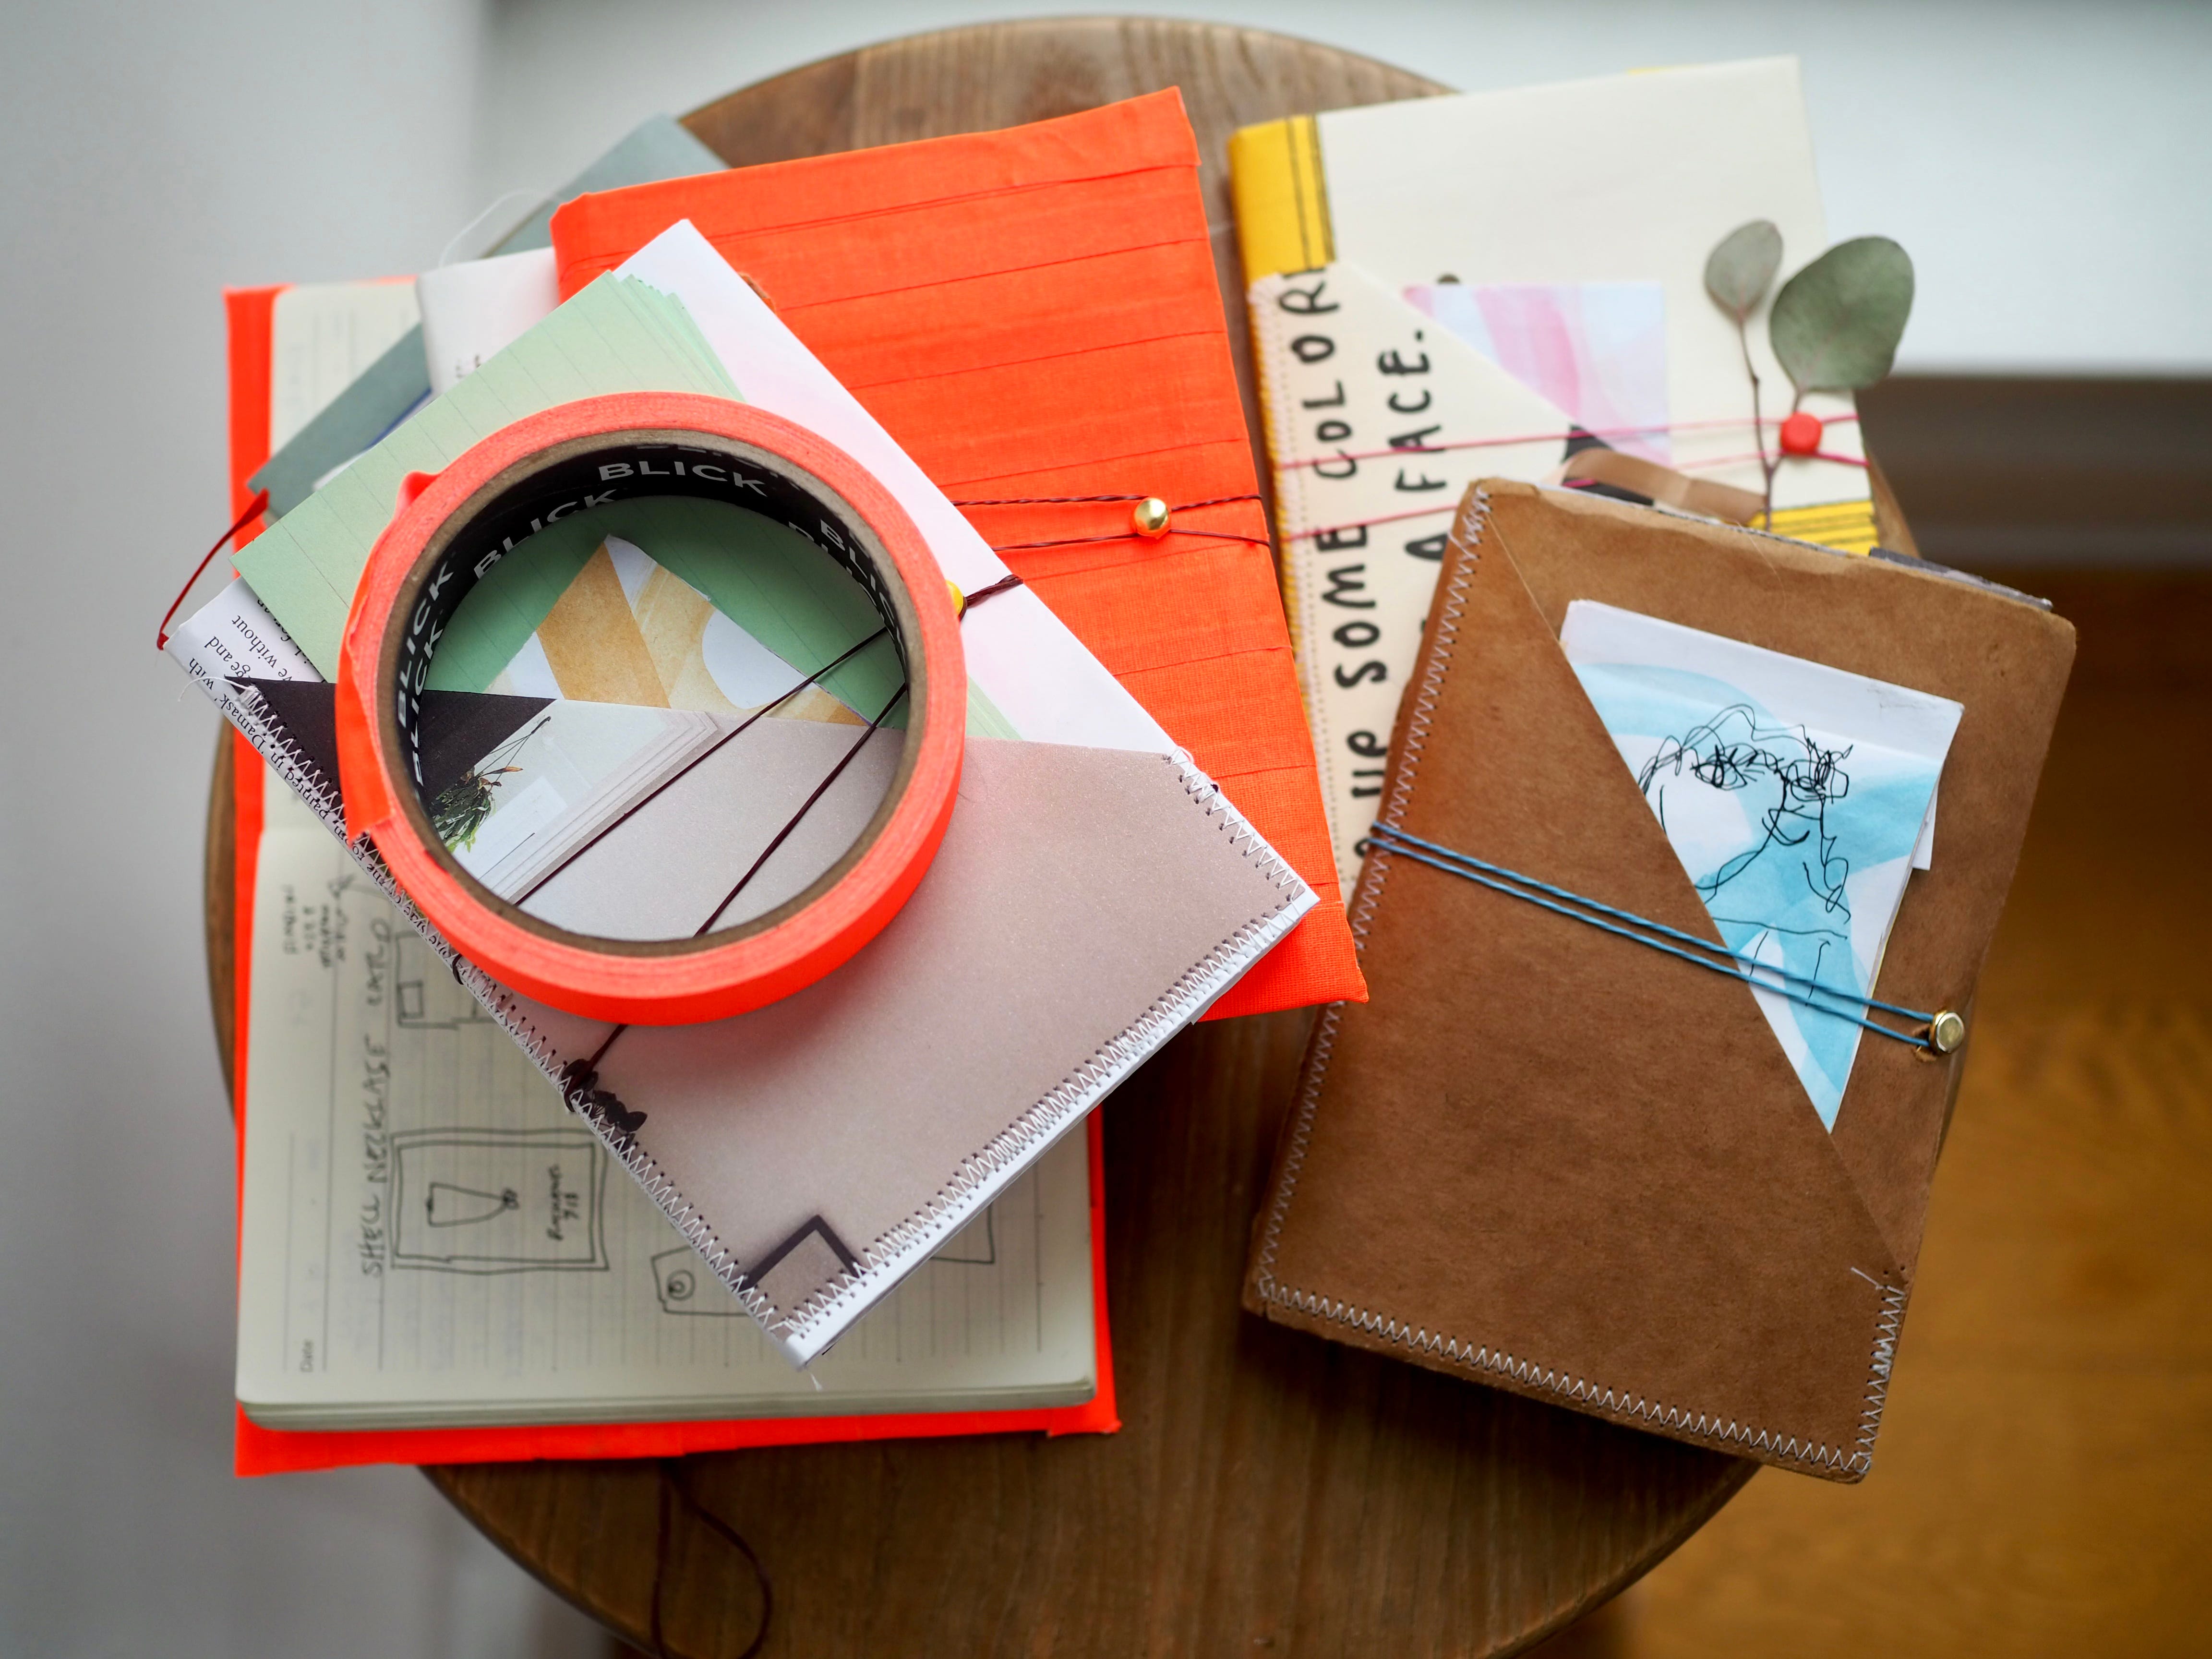
These covers shine in the mishmash of found papers and the contrasting, stitched pockets; like an ever-shifting mini-collage. The cover compartments makes notes and papers easily visible and accessible and the wrap-around rubber band secures it all without the need for a fussy tie. Since I tend to use sized A4 notebooks, having a unique cover is a great way to differentiate the books and notate their content without having to thumb through the pages.
Supplies to make a scrap paper, pocketed cover:
scrap paper that is at-least 3” taller and 3” longer than an open journal (you can glue two smaller pieces together if needed). Plus extra paper set aside for pockets.
journal or notebook
sewing machine and thread
scissor
hole punch
metal fastener
rubberband
Pt.1- scrap paper to simple journal cover (above video)
Pt. 2- cutting scrap paper into pockets (above video)
Notes:
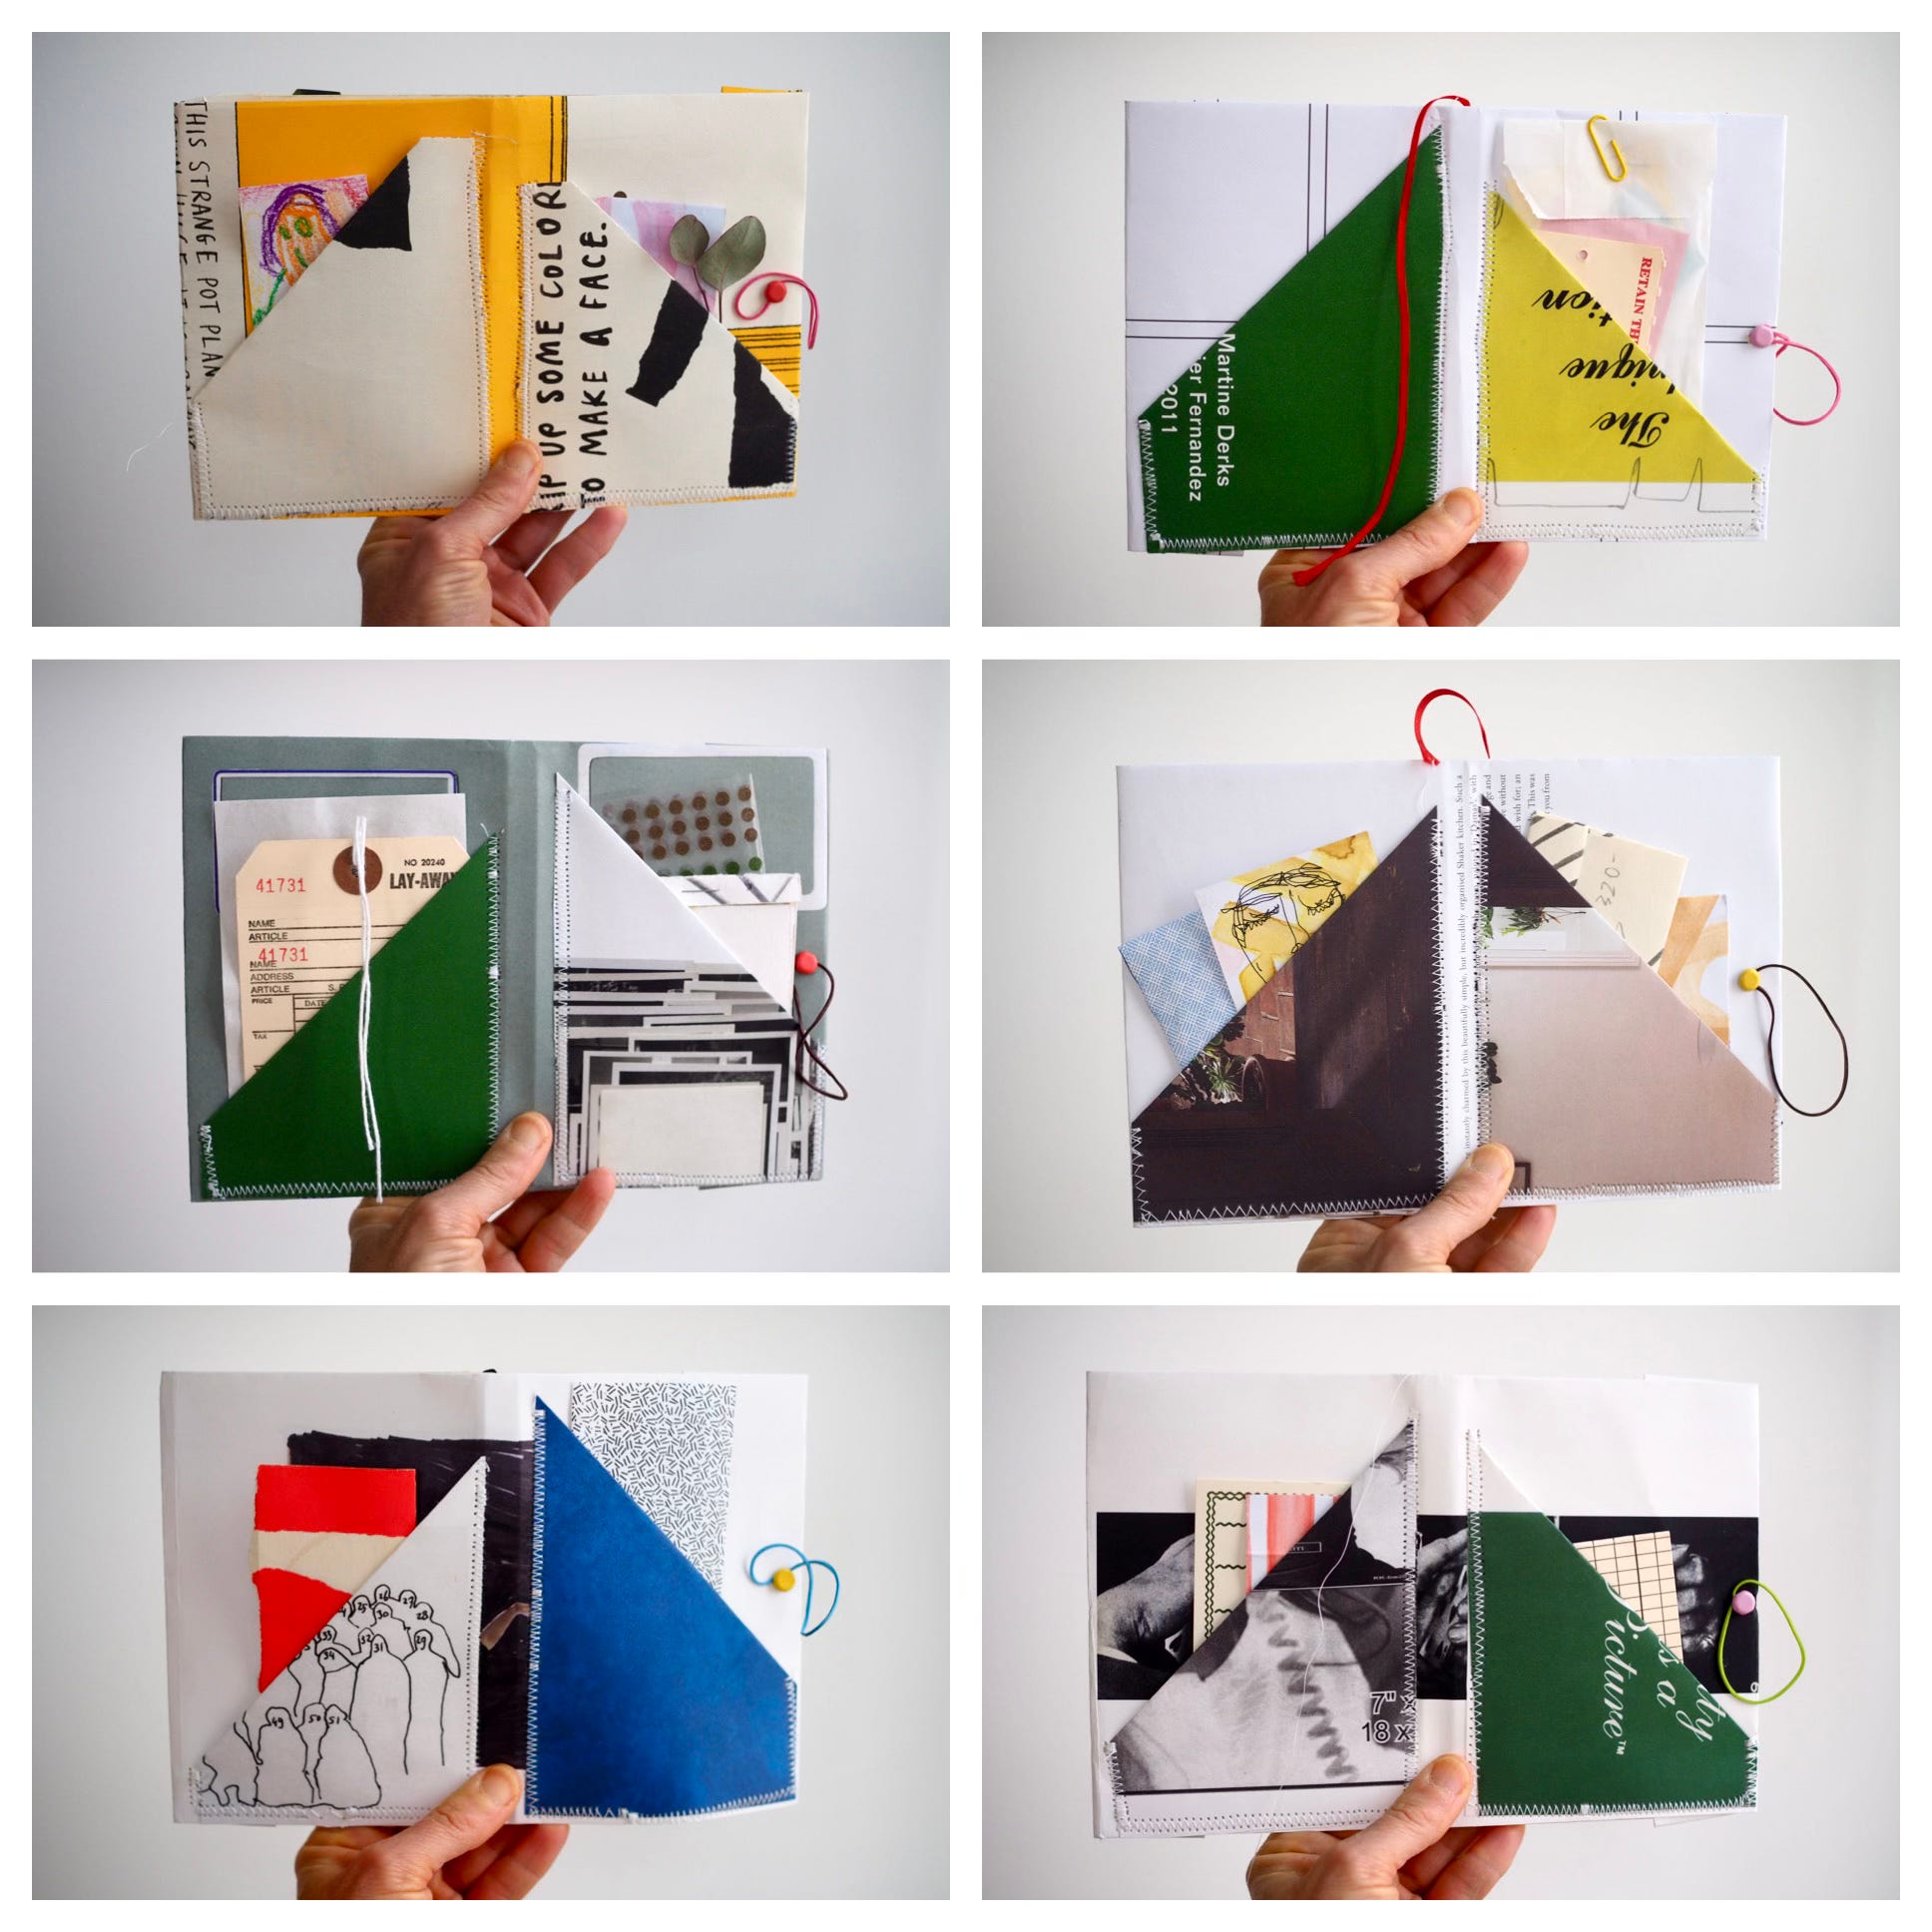
You don’t have to be precise when folding squares of paper into triangle pockets, since they will probably need to be trimmed to fit, and exact proportions are not necessary.
Make sure that the folded edge of the triangle is the pocket opening, and the two open edges of the triangle will be stitched down in place. The doubled paper gives the pocket extra strength and protection from tears.
Match the bottom-left corner of your journal and the bottom-left edge of the pockets, cut any overlap points.
Pt. 3- sewing the pockets in place (above video)
Notes:
Use a zig-zag stitch to securely sew the pockets to the cover.
Match the open edges of your pocket triangle to the spine of the book and along the bottom edge of your notebook.
Make sure the flap, where you insert the journal front and back covers, remains open and does not get stitched down as you sew.
Pt. 4- the finishing touches to bind the journal closed (above video)
Notes:
If you don’t want to punch a hole through your notebook, you can just pierce the paper cover. However, I would recommend layering a sticker, or piece of tape, before you make your hole, to reinforce the paper.
Gaffers Tape Journal Covers
Remember the duct-tape-wallet? This is like that, as you start off with a foundation of ‘fabric’ tape. For this project, I recommend swapping out plastic duct tape for gaffers tape. Gaffers has a matte, woven, cotton surface, comes in a large selection of bright, punchy colors, and fares well over time. The durable material can also be torn by hand and won’t leave a mark when removed from a surface. While gaffers tape can be found in artist supply shops and some hardware stores, when purchasing online, go for the good stuff often labeled “pro”, not the bargain pack rolls commonly called ‘standard’. The tape quality can make a big difference in the outcome and longevity of your finished jacket, and a gaffers journal cover is a good looking, solid alternative to more expensive, store-bought options.


Supplies to make tape fabric:
1-inch wide gaffers tape (look for the good stuff labeled pro)
scissor (optional as gaffers tape can easily be ripped by hand)
To make fabric from tape you will need to layer long pieces of tape, sticky side up so they slightly overlap to construct the ‘fabric’ dimensions needed. Once you have the bottom layer laid out, add a top layer, sticky side down, onto the exposed tape. This will make a durable and strong ‘fabric-like’ material. Don’t worry if the two short edges are jagged and uneven, these will be trimmed to size in the next step.


Supplies to make a gaffers tape journal cover:
gaffers tape ‘fabric’ -the same height (or slightly larger), and 2-3 inches longer than your open journal
journal/notebook
scissor
hole punch
metal fastener
rubber band
Pt. 1-How to make a journal cover from fabric tape:
Notes:
Use one long piece of tape to secure the two folded-in-flaps in place on the top. And repeat with a second piece along the bottom edge.
With your hands, simply tear the 4 overlapped pocket edges so you can insert your journal.
Pt. 2- How to add a bound closure to your gaffers journal cover:
Notes:
Punch a hole in the center edge of the cover, going through both layers. However, when you insert the metal fastener, secure the brad on the inside of the first layer, so the journal cover can still slide inside.
The two inside jacket flaps can be utilized for storing additional papers.
And while you have some gaffers tape on hand, you can add a two second pen/pencil holder to your covered jacket. Simply wrap the outside of your pen/pencil with a piece of tape, sticky side facing out. Stick that tape rolled pen where you want it to sit along the journal’s covered spine. Place an additional piece of tape so it completely covers the exposed tape, and secures the holder to the front and backside of the book cover. The pen/pencil should be snug enough that it stays put, but can also easily slide out when needed.
Don’t forget, you can embellish your journal with additional inside pockets, pocket treats, and stickers as pockets. As I strongly believe in pockets, everywhere, on everything, and always.
You have cool tools!
I now want/need the nifty paper cutter and the super efficient hole punch!
Thanks for the great ideas/instructions!
I love this project, thank you! All my school days we covered our books. All the doodling we did on them🥰 This is an elevated version! Thank you again-